Let’s face it; detailing your motorcycle is a time-consuming job we all dread but it is important to maintain your pride and joy not only for aesthetic purposes, but functionality too.
Riding through all sorts of weather conditions and road surfaces can lead to your motorcycle building up debris, so let’s take a look at why detailing is important.
WHY DETAILING MATTERS:
Preserves paintwork
- Regular cleaning and waxing protect the paintwork from environmental factors such as dirt, road salts, UV rays, and moisture, which can cause fading, rust, and wear.
Enhances performance
- Cleaning your motorcycle ensures that dirt, grime, and oil don’t accumulate in critical areas like the brakes, exhaust, or engine. Cleaning the chain and lubricating it properly ensures smooth operation and reduces the risk of mechanical failure while riding.
Improves longevity
- Regular maintenance and detailing can extend the lifespan of the bike by keeping critical components in better condition for longer.
Looks great
- A well-maintained motorcycle helps preserve the overall look and condition. Ride with pride on a clean, shiny bike.
GATHER YOUR SUPPLIES
- Motorcycle-specific cleaning products (soap, wax, tyre cleaner, leather cleaner, etc)
- Chain cleaner or lubricant
- Microfiber cloths
- Water hose OR pressure washer
- Bucket/s
- Soft detailing brushes (scratch resistant)
- Sponges
- Motorcycle stand
 PREPARE
Find a place to wash your bike, where you don’t mind the mess.
Important! If you have just taken your bike out for a ride, let the engine cool down completely before you start washing.
DETAILING TIME
Important! If you are using a pressure washer or water hose, avoid areas like the radiator grills, any electronic areas (screens), and any other sensitive areas.
Step 1: Rinse your bike
Start by using your pressure washer or hose to rinse away all that extra dirt and grime, making sure to get in the hard-to-reach spots.
Step 2: Wash the body of the bike
Pour the motorcycle specific cleaner in a bucket of water, then use a soft sponge or microfiber cloth to gently wash the body of the bike.
Be sure to use a dry, clean microfiber cloth to dry the excess water to avoid water spots.
Step 3: Clean the wheels
Spray the wheels with a wheel cleaner and let it sit for 30 seconds to a minute. Use a soft sponge and soapy water and start washing the wheels, however if your motorcycle has wire-spoked wheels, use a detailing brush to get in the hard-to-reach areas.
Step 4: Time to clean the engine
A motorcycle engine is tricky to clean with dirt and debris finding its home in the engine parts.
Use a specialised engine degreaser and a scratch-resistant sponge or brush to remove all the grime build up. Make sure to use a brush to get in those hard-to-reach areas. Rinse with water thoroughly.
Step 5: Motorcycle chain
Use a motorcycle stand (if you have one) and prop your bike up to have easy access to your rear wheel and chain. Before you start cleaning, this is a good time to check the current state of the chain.
If your chain is still in good condition, we can start knockin’ all that grime off. Using a motorcycle chain cleaner, simply spray it on and move the rear wheel slowly to spray the cleaner on the entire chain. Allow it to penetrate and finally wipe away the excess.
For stubborn dirt and grease, scrub the chain with a non-abrasive brush. Use a dry cloth to wipe away any excess chain cleaner.
Lastly, with a clean and dry chain, apply lubricant to all sides evenly.
Step 6: Give your bike a rinse, again
Make sure to rinse your bike of all the cleaners and soap, ensure you get all the hard-to-reach areas. Make sure there’s no cleaners or soap left on the bike.
Grab a clean microfiber cloth and dry your bike thoroughly to ensure there are no water spots.
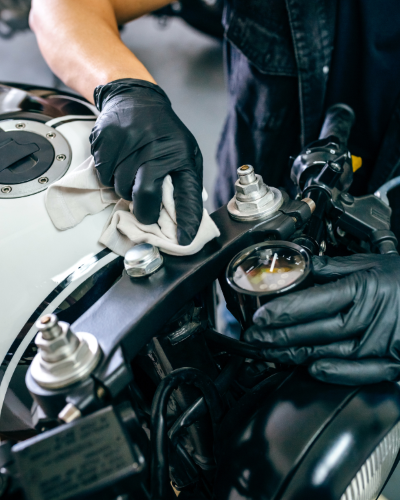
Step 7: Finishing touches
Grab a gentle leather or vinyl cleaner and squirt a small dollop onto a clean microfiber cloth and work it into the dash in circular motions.
Next, apply a bit of polish or wax to a clean microfiber cloth and smear it on your bike’s bodywork one panel at a time. Applying light pressure, rub the polish or wax in a circular motion.
Headlights and taillights are incredibly important. They allow you to see the way and be seen by other road users. Use a plastic-friendly headlight/taillight polish with a clean microfiber cloth and polish the lights in a circular motion. Rinse with water and dry with a clean cloth to ensure no water spots remain.
Clean your leather seat with a clean cloth and a dollop of leather cleaner, be sure to work into the leather, then wipe over the excess and let it dry.
DO NOT!
- Do not use tyre shine on your tyres – this is very dangerous and can cause your tyres to become extremely slippery
- Do not use armorall or slippery products on your seats or rubber areas like tyres, footrests or handgrips as this will make these areas very slippery
And viola! Your pride and joy is now clean, shiny and ready to turn heads.
It is impossible to not get your motorcycle dirty and dusty, however, regular detailing not only enhances its appearance but also contributes to its longevity and performance. Regular detailing also allows you to take a closer look at your bike for any damage, giving you the chance to fix anything before it gets worse. We hold regular motorcycle maintenance nights, where a professional mechanic shows you how to look after your bike and leave it in optimal and safe working order.
Taking the time to detail your motorcycle can be a rewarding experience that showcases your pride in your ride while ensuring it stays in top condition for years to come.
